メモ帳でミニゲームを作成
メモ帳でスロットゲームの作り方を説明いたします。使用するソフトはプログラムを記述するメモ帳と、スロットの絵柄を作成するペイントと、プログラムを実行するコマンドプロンプトのみです。いずれもWindows標準の付属ソフトなので何かインストールする必要はありません。以前の記事でも書きましたがプログラミングを始めるために色々ソフトをインストールして開発環境を構築するのが初心者にとってハードルが高くプログラミングを始める障害になってしまいます。本記事ではお手軽にゲームを作ってみようという内容です。ぜひこの機会にゲームプログラミングを始めてみましょう!
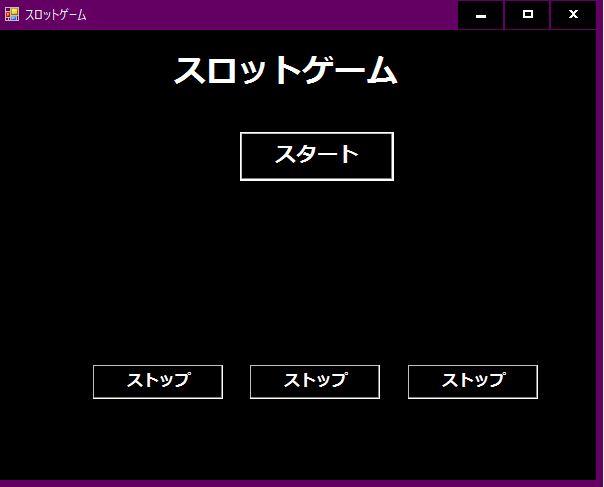
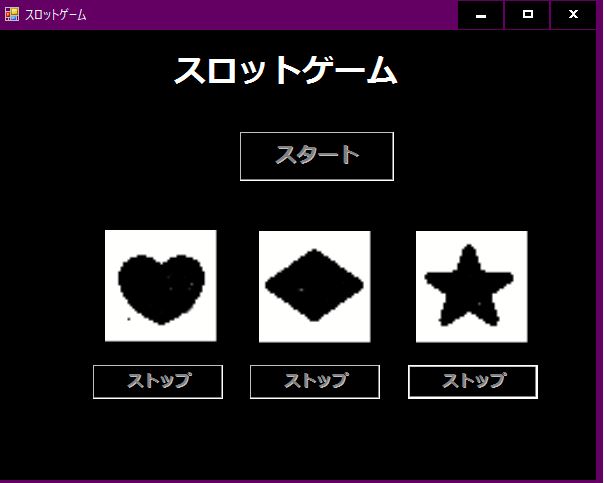
■完成品のイメージ
どんなゲームをつくるのか完成したスロットゲームの画像を見てみましょう。
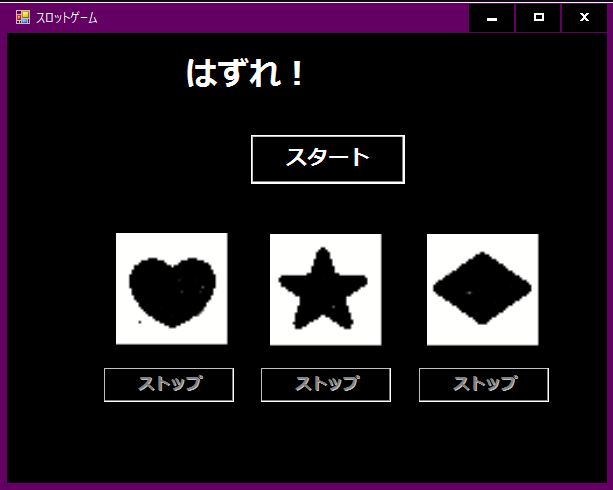
Windowsのフォームアプリで作成します。コントロールの構成は、スタートボタン、絵柄3つ、ストップボタン3つ、結果表示のラベルという内容です。ゲーム内容は、スタートボタンボタンをクリックするとピクチャーボックス3つの絵柄に3種類(★、💛、♦)がランダムに表示され、ストップボタンを順番に3つクリックするとラベルに結果が表示されるというゲームです。それでは作成していきましょう。
■コンパイラの実行ファイルの作成
下記記事を参考にして「C:\Users\sumio」のフォルダ内にC#コンパイラの「csc.bat」ファイルを作成します。(PCごとにフォルダのユーザ名は違います)

■csファイルの作成
下記記事を参考にして、「C:\Users\sumio」のフォルダ内に「slot3.cs」ファイルを作成します。ここまでは、以前作成した記事の内容となります。
■絵柄の画像ファイルの作成
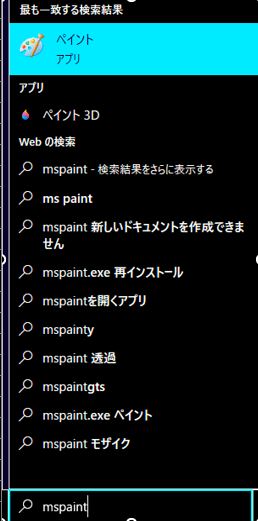
まずは絵柄の画像を作成しましょう。Windowsの検索に「mspaint」と入力するとWindows標準で付属している「ペイント」アプリが表示されるので選択します。
ペイントが起動します。
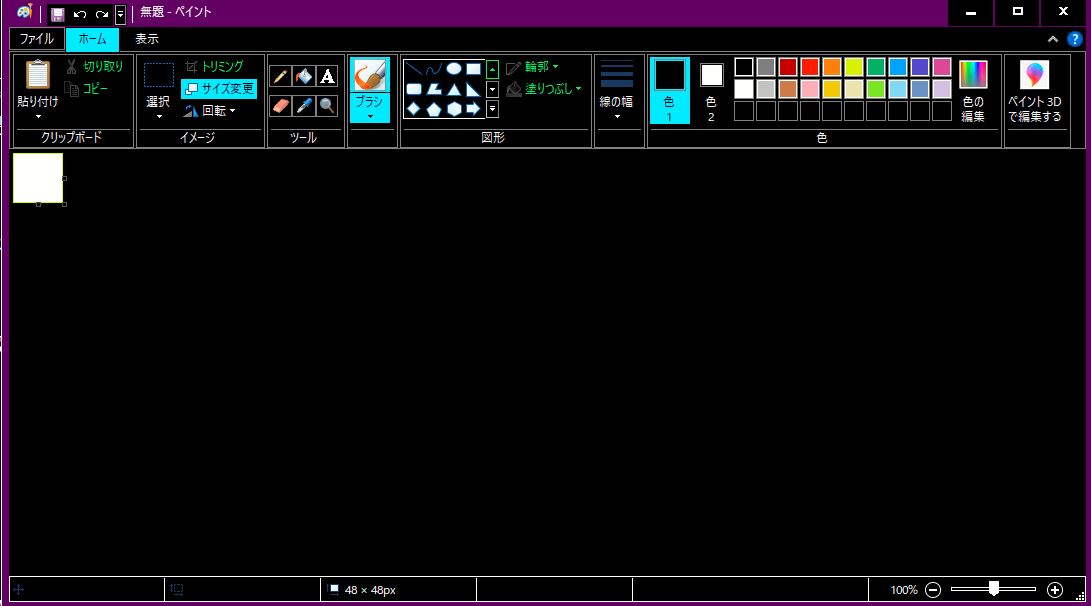
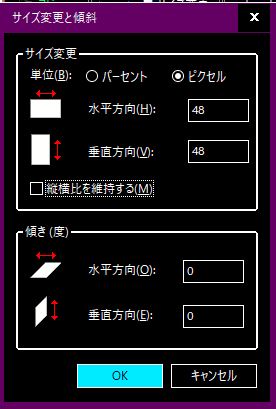
メニューの「サイズ変更」をクリックしサイズを下記のように変更し「OK」ボタンをクリックします。
項目サイズ変更→ピクセル選択→水平方向「48」→垂直方向「48」→縦横比を保持するチェックを外す
下図の様に枠の中に図形から★マークをドラッグアンドドロップで選択し色を塗りつぶします。
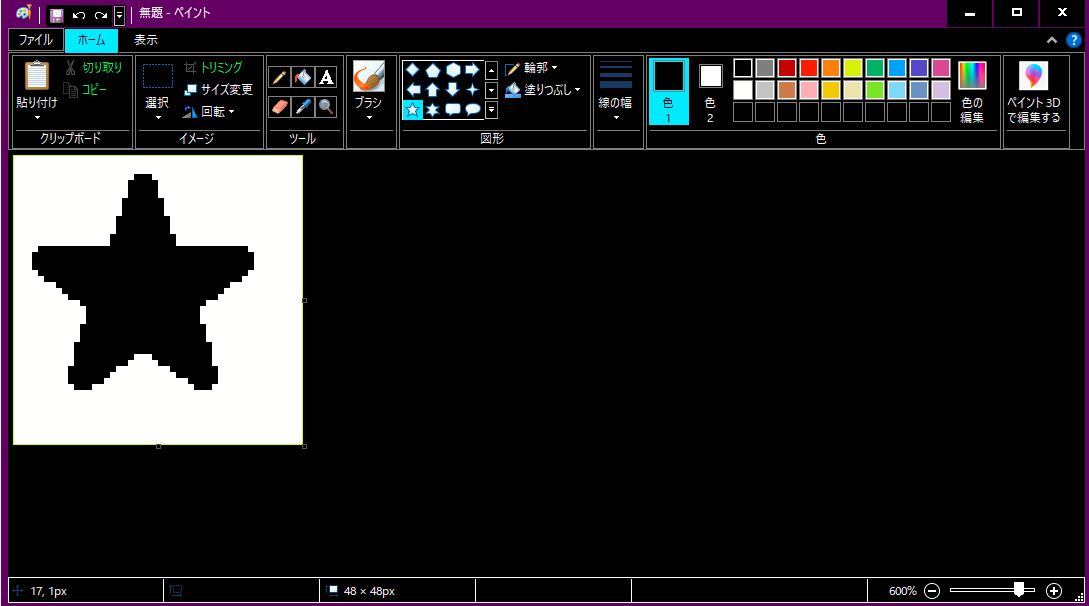
ファイル名を「star.png」とし、プログラムファイル「slot3.cs」と同じフォルダ内の「C:\Users\sumio」へ保存します。
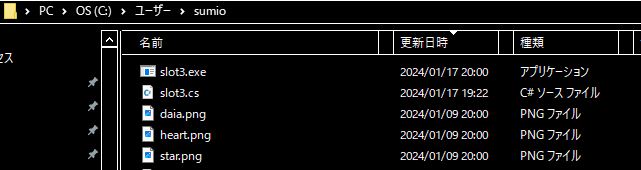
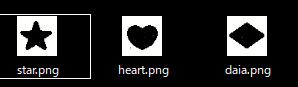
同様の手順で💛マーク「heart.png」ファイルと♦マーク「daia.png」ファイルを作成し「C:\Users\sumio」フォルダへ保存します。
これで画像ファイルの作成が完了しました。「C:\Users\sumio」の中のファイル構成は下記の5ファイルになります。
csc.bat
daia.png
heart.png
star.png
slot3.cs
■フォームの作成
それではこれからプログラムを記述していきます。コマンドプロンプトを起動し「notepad slot3.cs」を入力し実行します。
C:\Users\sumio>notepad slot3.cs
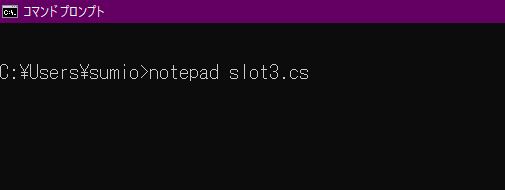
コマンドを実行するとメモ帳から「slot3.cs」ファイルが立ち上がります。(中身は空です)
そのcsファイルにWindowsのフォームを作成するプログラムを下記のように記述します。
using System.Windows.Forms;

class FormSlot : Form
{
    static void Main()
  {
        Application.Run( new FormSlot());
    }
}
このコードは「System.Windows.Forms」のFormクラスを継承した「FormSlot」クラスを定義し、Mainメソッド内でFormSlotを実行しフォームを表示するという内容です。
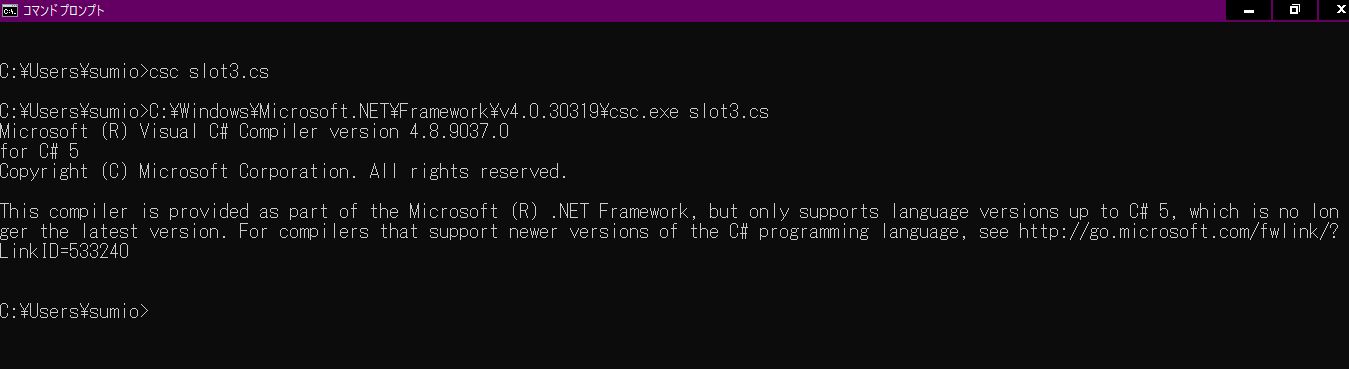
ここで一度プログラムを実行してみましょう。コマンドプロンプトで下記のように入力し実行します。
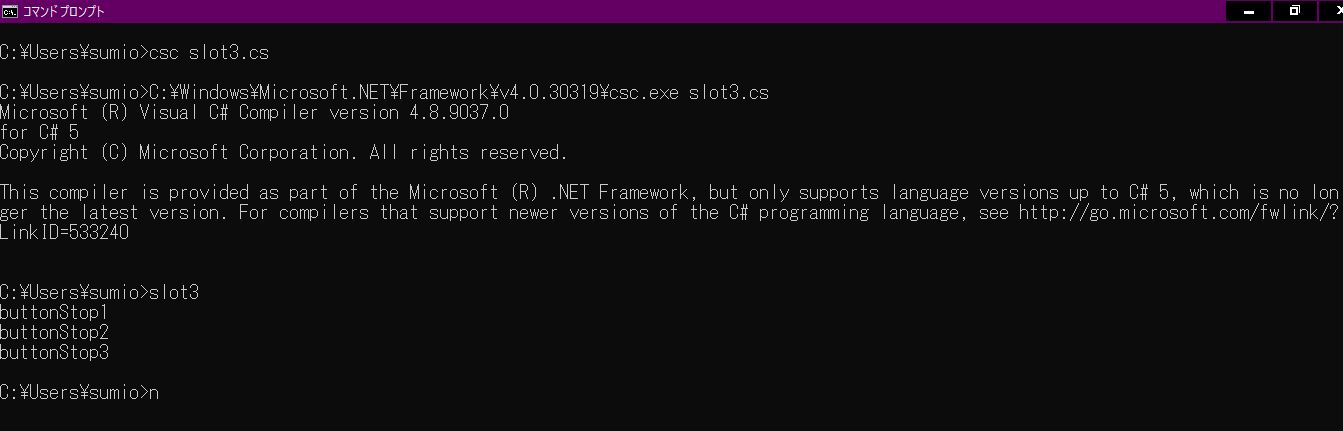
C:\Users\sumio>csc slot3.cs
最初の項目で作成したC#コンパイラ実行ファイル「csc.bat」をファイル指定「slot3.cs」で実行するというコマンドです。下図のように表示されるとコンパイルは成功です。
これにより「C:\Users\sumio」フォルダ内に「slot3.exe」という実行ファイルが作成されます。そして下記コマンドを実行してみましょう。
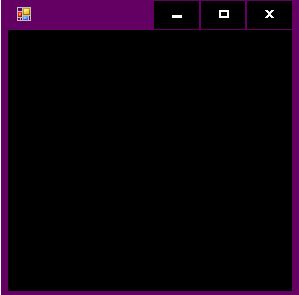
C:\Users\sumio>slot3
別ウインドウでフォーム画面が起動します。
今、コマンド実行したような流れで、コード記述→コンパイル→プログラム実行というようにこまめに実行していくことでエラー発生時のエラー箇所を特定しやすくなります。
■フォームのサイズ変更
「public FormSlot()」メソッドを作成しフォームのサイズを変更する記述をします。また今後使用するusingディレクティブを追記します。//1の4行と//2の4行を追記します。「//」の右の部分はコメントアウトされます。
using System;       //1
using System.Drawing;  //1
using System.Text;   //1
using System.Threading.Tasks; //1
using System.Windows.Forms;

class FormSlot : Form
{
    public FormSlot() //2
    {                  //2
        Size = new Size(600, 450); //2
    }                  //2

    static void Main()
  {
        Application.Run( new FormSlot());
    }
}
ここでまた、下記2つのコマンドを実行してみましょう。
C:\Users\sumio>csc slot3.cs
C:\Users\sumio>slot3
コンパイルが成功しフォームのサイズがX軸600ピクセル、Y軸450ピクセルで表示されるようになりました。(今後このコマンドの説明は省略します)
■コントロールの配置
これからフォーム上にボタンや画像を表示するプログラムを記述していきます。
FormSlotクラスにコメントアウト(//3)した8行のコードを追記しましょう。これはラベルとボタンとピクチャーボックスの各々のコントロールを定義しています。
using System;
using System.Drawing;
using System.Text;
using System.Threading.Tasks;
using System.Windows.Forms;

class FormSlot : Form
{
    Label labelTitle = new Label();    //3
    Button buttonStart = new Button(); //3
    Button buttonStop1 = new Button(); //3
    Button buttonStop2 = new Button(); //3
    Button buttonStop3 = new Button(); //3
    PictureBox pictureBox1 = new PictureBox(); //3
    PictureBox pictureBox2 = new PictureBox(); //3
    PictureBox pictureBox3 = new PictureBox(); //3

    public FormSlot()
    {
        Size = new Size(600, 450);
    }

    static void Main()
    {
        Application.Run( new FormSlot());
    }
}
この時点でもコンパイル→プログラム実行で問題なく実行されます。
それではフォームに配置する各部品のプロパティを記述していきます。下記のprivate void InitializeComponent()メソッドを「public FormSlot」メソッドと「static void Main」メソッドの間にすべて記述します。
    private void InitializeComponent()
    {
       ///
       ///スタートボタンの設定
       ///
        this.buttonStart.Font = new Font("メイリオ", 16, FontStyle.Bold);
        this.buttonStart.Location = new Point(244, 102);
        this.buttonStart.Name = "buttonStart";
        this.buttonStart.Size = new Size(154, 49);
        this.buttonStart.TabIndex = 1;
        this.buttonStart.Text = "スタート";
        this.buttonStart.UseVisualStyleBackColor = true;
       ///
       ///ピクチャーボックス1の設定
       ///
        this.pictureBox1.Location = new Point(100, 200);
        this.pictureBox1.Name = "pictureBox1";
        this.pictureBox1.Size = new Size(130, 112);
        this.pictureBox1.SizeMode = PictureBoxSizeMode.Zoom;
        this.pictureBox1.TabStop = false;
       ///
       ///ピクチャーボックス2の設定
       ///
        this.pictureBox2.Location = new Point(254, 201);
        this.pictureBox2.Name = "pictureBox2";
        this.pictureBox2.Size = new Size(130, 112);
        this.pictureBox2.SizeMode = PictureBoxSizeMode.Zoom;
        this.pictureBox2.TabStop = false;
       ///
       ///ピクチャーボックス3の設定
       ///
        this.pictureBox3.Location = new Point(411, 201);
        this.pictureBox3.Name = "pictureBox3";
        this.pictureBox3.Size = new Size(130, 112);
        this.pictureBox3.SizeMode = PictureBoxSizeMode.Zoom;
        this.pictureBox3.TabStop = false;
       ///
       ///ストップボタン1の設定
       ///
        this.buttonStop1.Font = new Font("メイリオ", 12, FontStyle.Bold);
        this.buttonStop1.Location = new Point(97, 335);
        this.buttonStop1.Name = "buttonStop1";
        this.buttonStop1.Size = new Size(130, 34);
        this.buttonStop1.TabIndex = 2;
        this.buttonStop1.Text = "ストップ";
        this.buttonStop1.UseVisualStyleBackColor = true;
       ///
       ///ストップボタン2の設定
       ///
        this.buttonStop2.Font = new Font("メイリオ", 12, FontStyle.Bold);
        this.buttonStop2.Location = new Point(254, 335);
        this.buttonStop2.Name = "buttonStop2";
        this.buttonStop2.Size = new Size(130, 34);
        this.buttonStop2.TabIndex = 3;
        this.buttonStop2.Text = "ストップ";
        this.buttonStop2.UseVisualStyleBackColor = true;
       ///
       ///ストップボタン3の設定
       ///
        this.buttonStop3.Font = new Font("メイリオ", 12, FontStyle.Bold);
        this.buttonStop3.Location = new Point(412, 335);
        this.buttonStop3.Name = "buttonStop3";
        this.buttonStop3.Size = new Size(130, 34);
        this.buttonStop3.TabIndex = 4;
        this.buttonStop3.Text = "ストップ";
        this.buttonStop3.UseVisualStyleBackColor = true;
       ///
       ///ラベルタイトルの設定
       ///
        this.labelTitle.AutoSize = true;
        this.labelTitle.Font = new Font("メイリオ", 24, FontStyle.Bold);
        this.labelTitle.Location = new Point(173, 18);
        this.labelTitle.Name = "labelTitle";
        this.labelTitle.Size = new Size(305, 60);
        this.labelTitle.Text = "スロットゲーム";
       ///
    ///フォームFormSlotの設定
       ///
        this.Name = "FormSlot";
        this.Text = "スロットゲーム";
        this.AutoScaleDimensions = new SizeF(8, 15);
        this.AutoScaleMode = AutoScaleMode.Font;
        this.ClientSize = new Size(600, 450);
        this.Controls.Add(this.labelTitle);
        this.Controls.Add(this.buttonStart);
        this.Controls.Add(this.pictureBox1);
        this.Controls.Add(this.pictureBox2);
        this.Controls.Add(this.pictureBox3);
        this.Controls.Add(this.buttonStop1);
        this.Controls.Add(this.buttonStop2);
        this.Controls.Add(this.buttonStop3);
    }
今記述した「InitializeComponent()」メソッドを呼び出すコードを追記します。FormSlotメソッド内に//4を追記します。
public FormSlot()
    {
        Size = new Size(600, 450);
        InitializeComponent();   //4
    }
ここでコマンドを実行してフォームの表示を見てみましょう。
C:\Users\sumio>csc slot3.cs
C:\Users\sumio>slot3
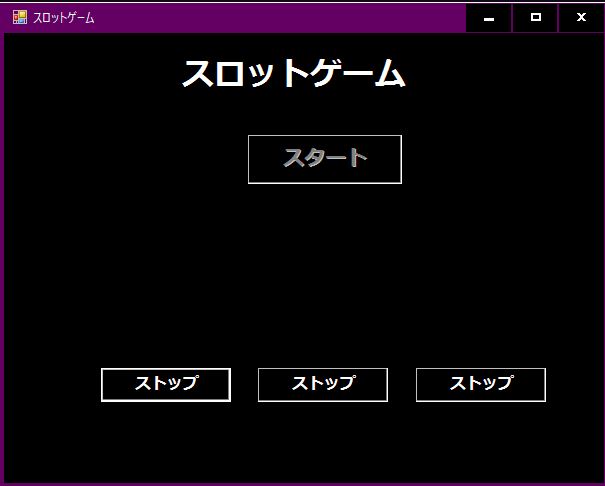
フォームにタイトル、ラベル、スタートボタン、ストップボタンが表示されました。ピクチャーボックス3つはまだ画像のパスを記述してないので表示されません。また、ボタンもまだコードを記述していませんのでクリックしてもなにも起こりません。
■画像パスの設定
本記事の最初にピクチャで作成した、★、💛、♦の画像を保存したパスを設定しピクチャボックスに表示させるための参照パス設定を記述します。FormSlotクラスの先頭部分に//5を追記します。//5では「imgPath」変数をString[]の配列3要素で定義しています。
class FormSlot : Form
{
    String[] imgPath = new String[3];  //5

    Label labelTitle = new Label();
    Button buttonStart = new Button();
    Button buttonStop1 = new Button();
    Button buttonStop2 = new Button();
   //以下省略//
次にInitializeComponentメソッドの先頭部分に//6を追記します。これは画像のパスをimgPathの配列変数に代入しています。
  private void InitializeComponent()
    {
       ///                                        //6
       ///画像ファイルの参照パス設定               //6
       ///                                        //6
        imgPath[0] = @"C:\Users\sumio\daia.png"; //6
        imgPath[1] = @"C:\Users\sumio\star.png"; //6
        imgPath[2] = @"C:\Users\sumio\heart.png"; //6
       ///
       ///スタートボタンの設定
       ///

    //以下省略//
この時点でもコンパイルは実行されるのですがフォームに画像はまだ表示されません。
■ストップボタンを無効にする
ゲーム開始時点ではスタートボタンだけを有効にし、ストップボタンは押せないようにします。フォームを最初に読み込んだ時に実行されるFormSlot_Loadメソッドを作成します。FormSlotメソッドの下に下記をすべて追記します。//7でストップボタンを無効にしています。
   private void FormSlot_Load(object sender, EventArgs e)
    {
        buttonStop1.Enabled = false; //7
        buttonStop2.Enabled = false; //7
        buttonStop3.Enabled = false; //7
    }
次にFormSlot_Loadメソッドを呼び出すコードを追記します。InitializeComponentメソッドの最終行に//8を記述します。こでによりInitializeComponentメソッドが実行されたら
FormSlot_Loadメソッドも呼び出されることになります。(最初の3行はコメントです)
       ///                          //8
    ///イベントハンドラの設定               //8
       ///                          //8
        this.Load += new EventHandler(this.FormSlot_Load); //8
    }
ここでコンパイラを実行してフォームの表示を見てみましょう。
C:\Users\sumio>csc slot3.cs
C:\Users\sumio>slot3
フォームが表示されスタートボタンだけ有効のまま、ストップボタンが無効になりクリックできなくなりました。
■スタートボタンの処理
スタートボタンをクリックしたときのコードを記述していきます。今まではボタンをクリックしてもイベント処理を記述していませんので何も起きませんでした。まず初めにスタートボタンを押したらストップボタンを有効にし、スタートボタンを無効にするようにします。下記コードをMain()メソッドの上に記述します。また1行目は長いのでカッコの右側は改行しています。
    private async void buttonStart_Click(  //9
    object sender, EventArgs e)     //9
    {
        buttonStop1.Enabled = true; //10
        buttonStop2.Enabled = true; //10
        buttonStop3.Enabled = true; //10
        buttonStart.Enabled = false; //10

        await Task.Delay(100); //11
    }
//9の「async」は非同期処理の宣言です。
//10でストップボタンを無効にし、スタートボタンを有効にしています。
//11ではこの項目以降に記述するループ処理で使います。一定時間(100ミリ秒)処理を停止するためのものです。(asyncを使うとawait演算子を記述しないとエラーとなる)
次にスタートボタンをクリックしたときのイベントハンドラーを追加します。先ほど追記した
InitializeComponentメソッドの最終行に//12を追記します。(途中で改行しています)
        //途中省略//
       ///
    ///イベントハンドラの設定
       ///
        this.Load += new EventHandler(this.FormSlot_Load);
        this.buttonStart.Click += new EventHandler(  //12
       this.buttonStart_Click);         //12
    }
ここでコンパイラを実行してフォームの表示を見てみましょう。
C:\Users\sumio>csc slot3.cs
C:\Users\sumio>slot3
フォームが表示され時点ではスタートボタンだけが有効で、スタートボタンをクリックするとスタートボタンが無効になり、ストップボタンは有効になります。
■ストップボタンの処理
今度はストップボタンをクリックしたときのコードを記述していきます。下記コードをbuttonStart_Clickメソッドの下(Mainメソッドの上)に記述します。
    private void buttonStop_Click(object sender, EventArgs e)
    {
        Button btn = (Button)sender;  //13
        btn.Enabled = false;      //14
        Console.WriteLine(btn.Name);    //15
    }
//13でsender変数をButtonクラスで定義しbtn変数に代入しています。3つの各ストップボタンの内どのボタンをクリックしたのかbtn変数に入れています。
//14でクリックされたストップボタンを無効にします。1回だけクリックできるようにします。
//15は、後ほど動作確認のデバッグ用のために追加します。(最後に消します)
次にストップボタンのイベントハンドラを設定します。下記//16の3行をInitializeComponentメソッドの最終行に追記します。
       ///
    ///イベントハンドラの設定
       ///
        this.Load += new EventHandler(this.FormSlot_Load);
        this.buttonStart.Click += new EventHandler(this.buttonStart_Click);
        this.buttonStop1.Click += new EventHandler(this.buttonStop_Click); //16
        this.buttonStop2.Click += new EventHandler(this.buttonStop_Click); //16
        this.buttonStop3.Click += new EventHandler(this.buttonStop_Click); //16
    }
ここでコンパイラを実行してフォームの表示を見てみましょう。
C:\Users\sumio>csc slot3.cs
C:\Users\sumio>slot3
フォームが表示されスタートボタンをクリックすると、各ストップボタンが1回だけクリックできるようになります。ストップボタンは1回クリックすると無効になります。そしてコマンドプロンプトを見ると、先ほど//15で記述した「Console.WriteLine(btn.Name);」のコードにより、クリックした順番にストップボタンの名前がコマンドプロンプトに出力されます。これでどのストップボタンがクリックされたのか変数(btn)から値(Name)が取り出せるようになりました。
■画像をランダムに表示
ここでようやく画像を表示させるようにします。スタートボタンをクリックしたときの処理buttonStart_Clickメソッドを下記のように書き換えます。
 private async void buttonStart_Click(
    object sender, EventArgs e)
    {
        buttonStop1.Enabled = true;
        buttonStop2.Enabled = true;
        buttonStop3.Enabled = true;
        buttonStart.Enabled = false;

        Random r = new Random();  //17
        int index = 0;  //18

        while( true )     //19
        {
            if ( buttonStop1.Enabled )  //20
            {
                index = r.Next(3);      //21
                pictureBox1.ImageLocation = imgPath[index]; //22
            }
            await Task.Delay(100);  //23
        }
    }
//17では乱数r変数を定義しています。
//18では数値型index変数を定義し0を設定します。
//19ではメインループwhile文でtrueの間繰り返します。
//20ではストップボタン1の有効・無効プロパティ(Enabled)がtrueか判断(すなわち有効のとき)
//21では0から2の3つの整数の乱数をindex変数に代入します。
//22ではimgPath配列変数に★、💛、♦のランダムの画像パスをpictureBox1の画像の保存場所ImageLocationに設定しています。これでピクチャボックスにいずれかの画像が表示されます。
//23は元々記述していたコードをこの場所に移動しました。100ミリ秒(0.1秒)ごとに画像が切り替わって表示されます。
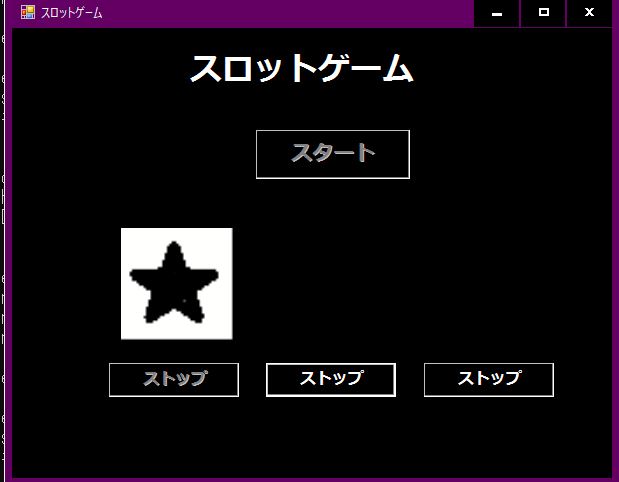
ここでコンパイラを実行してフォームの表示を見てみましょう。
C:\Users\sumio>csc slot3.cs
C:\Users\sumio>slot3
スタートボタンをクリックするとピクチャボックス1に3つの画像がランダムに表示され、ストップボタン1をクリックすると画像が停止します。
では同様に他の2つのストップボタンとピクチャボックスのコードを追記します。下記コードを先ほどの//23の上に追記します。
          if ( buttonStop2.Enabled )
            {
                index = r.Next(3);
                pictureBox2.ImageLocation = imgPath[index];
            }

            if ( buttonStop3.Enabled )
            {
                index = r.Next(3);
                pictureBox3.ImageLocation = imgPath[index];
            }
コンパイラを実行してフォームの表示を見てみましょう。
C:\Users\sumio>csc slot3.cs
C:\Users\sumio>slot3
スタートボタンをクリックすると3つのピクチャボックスに画像がランダムに表示されました。各ストップボタンをクリックすると画像が停止できるようになりました。
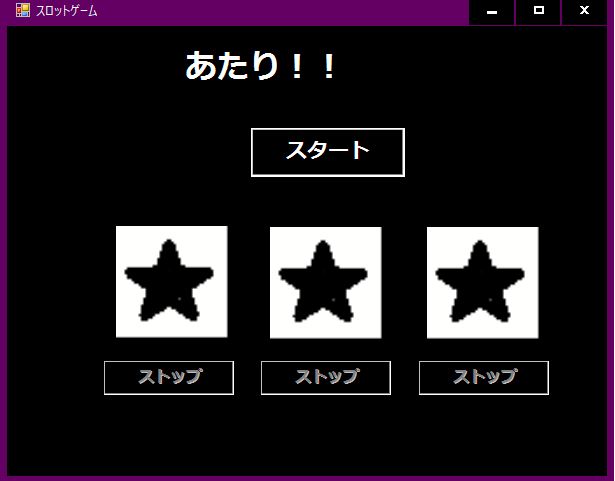
■あたり・はずれの表示と繰り返し
同じ絵柄が3つ揃ったら「あたり!!」それ以外は「はずれ!」をラベルに表示するようにします。また、ストップボタンが3つ押されたらスタートボタンを有効にし繰り返しゲームが開始できるようにします。buttonStart_Clickメソッドの中のwhileループの先頭に//24から//29の} までを追記します。
   //これより上省略//
        while( true )
        {
            if( buttonStop1.Enabled == false && //24
                buttonStop2.Enabled == false &&  //24
                buttonStop3.Enabled == false)    //24
            {
		if ( pictureBox1.ImageLocation == //25
                     pictureBox2.ImageLocation && //25
                     pictureBox2.ImageLocation == //25
                     pictureBox3.ImageLocation )  //25
                {
                     labelTitle.Text = "あたり!!";
                }else
                {
                     labelTitle.Text = "はずれ!" ;
                }
                buttonStart.Enabled = true; //26
                buttonStart.Focus();        //27
                break;                      //28
            }                               //29
            if ( buttonStop1.Enabled )
            {
                index = r.Next(3);
                pictureBox1.ImageLocation = imgPath[index];
            }
   //これより下省略//
//24ではbuttonStop1からbuttonStop3がすべてクリックされて無効(Enabled == false)になった時のif文です。
//25では絵柄がすべて同じ場合のif文です。絵柄が同じかの判断はImageLocationプロパティで画像の保存パスで判別しています。
//26ではスタートボタンを有効にします。//24の条件がtrueのとき、すなわちストップボタンがすべて押されたらスタートボタンが押せるようになります。
/27でスタートボタンにフォーカスします。マウスクリックせずにエンターキーでクリックさせるためです。ちなみにInitializeComponent()メソッド内の設定で、ボタンにインデックスを設定しています。(this.buttonStop3.TabIndex = 4;の次にスタートボタンにフォーカスするようにしています)
//28のbreak; でif文を抜けます。
コンパイラを実行して完成したゲームが動作するか確認しましょう。
C:\Users\sumio>csc slot3.cs
C:\Users\sumio>slot3
■完成したコード
完成した全コードを下記に掲載します。このコードをslot3.csファイルにコピペしcscでコンパイルし実行すればプログラムは動くと思います。(画像ファイルの保存も必要ですが)
using System;
using System.Drawing;
using System.Text;
using System.Threading.Tasks;
using System.Windows.Forms;

class FormSlot : Form
{
    String[] imgPath = new String[3];

    Label labelTitle = new Label();
    Button buttonStart = new Button();
    Button buttonStop1 = new Button();
    Button buttonStop2 = new Button();
    Button buttonStop3 = new Button();
    PictureBox pictureBox1 = new PictureBox();
    PictureBox pictureBox2 = new PictureBox();
    PictureBox pictureBox3 = new PictureBox();

    public FormSlot()
    {
        Size = new Size(600, 450);
        InitializeComponent();
    }

    private void FormSlot_Load(object sender, EventArgs e)
    {
        buttonStop1.Enabled = false;
        buttonStop2.Enabled = false;
        buttonStop3.Enabled = false;
    }

    private void InitializeComponent()
    {
       ///
       ///画像ファイルの参照パス設定
       ///
        imgPath[0] = @"C:\Users\sumio\daia.png";
        imgPath[1] = @"C:\Users\sumio\star.png";
        imgPath[2] = @"C:\Users\sumio\heart.png";
       ///
       ///スタートボタンの設定
       ///
        this.buttonStart.Font = new Font("メイリオ", 16, FontStyle.Bold);
        this.buttonStart.Location = new Point(244, 102);
        this.buttonStart.Name = "buttonStart";
        this.buttonStart.Size = new Size(154, 49);
        this.buttonStart.TabIndex = 1;
        this.buttonStart.Text = "スタート";
        this.buttonStart.UseVisualStyleBackColor = true;
       ///
       ///ピクチャーボックス1の設定
       ///
        this.pictureBox1.Location = new Point(100, 200);
        this.pictureBox1.Name = "pictureBox1";
        this.pictureBox1.Size = new Size(130, 112);
        this.pictureBox1.SizeMode = PictureBoxSizeMode.Zoom;
        this.pictureBox1.TabStop = false;
       ///
       ///ピクチャーボックス2の設定
       ///
        this.pictureBox2.Location = new Point(254, 201);
        this.pictureBox2.Name = "pictureBox2";
        this.pictureBox2.Size = new Size(130, 112);
        this.pictureBox2.SizeMode = PictureBoxSizeMode.Zoom;
        this.pictureBox2.TabStop = false;
       ///
       ///ピクチャーボックス3の設定
       ///
        this.pictureBox3.Location = new Point(411, 201);
        this.pictureBox3.Name = "pictureBox3";
        this.pictureBox3.Size = new Size(130, 112);
        this.pictureBox3.SizeMode = PictureBoxSizeMode.Zoom;
        this.pictureBox3.TabStop = false;
       ///
       ///ストップボタン1の設定
       ///
        this.buttonStop1.Font = new Font("メイリオ", 12, FontStyle.Bold);
        this.buttonStop1.Location = new Point(97, 335);
        this.buttonStop1.Name = "buttonStop1";
        this.buttonStop1.Size = new Size(130, 34);
        this.buttonStop1.TabIndex = 2;
        this.buttonStop1.Text = "ストップ";
        this.buttonStop1.UseVisualStyleBackColor = true;
       ///
       ///ストップボタン2の設定
       ///
        this.buttonStop2.Font = new Font("メイリオ", 12, FontStyle.Bold);
        this.buttonStop2.Location = new Point(254, 335);
        this.buttonStop2.Name = "buttonStop2";
        this.buttonStop2.Size = new Size(130, 34);
        this.buttonStop2.TabIndex = 3;
        this.buttonStop2.Text = "ストップ";
        this.buttonStop2.UseVisualStyleBackColor = true;
       ///
       ///ストップボタン3の設定
       ///
        this.buttonStop3.Font = new Font("メイリオ", 12, FontStyle.Bold);
        this.buttonStop3.Location = new Point(412, 335);
        this.buttonStop3.Name = "buttonStop3";
        this.buttonStop3.Size = new Size(130, 34);
        this.buttonStop3.TabIndex = 4;
        this.buttonStop3.Text = "ストップ";
        this.buttonStop3.UseVisualStyleBackColor = true;
       ///
       ///ラベルタイトルの設定
       ///
        this.labelTitle.AutoSize = true;
        this.labelTitle.Font = new Font("メイリオ", 24, FontStyle.Bold);
        this.labelTitle.Location = new Point(173, 18);
        this.labelTitle.Name = "labelTitle";
        this.labelTitle.Size = new Size(305, 60);
        this.labelTitle.Text = "スロットゲーム";
       ///
    ///フォームFormSlotの設定
       ///
        this.Name = "FormSlot";
        this.Text = "スロットゲーム";
        this.AutoScaleDimensions = new SizeF(8, 15);
        this.AutoScaleMode = AutoScaleMode.Font;
        this.ClientSize = new Size(600, 450);
        this.Controls.Add(this.labelTitle);
        this.Controls.Add(this.buttonStart);
        this.Controls.Add(this.pictureBox1);
        this.Controls.Add(this.pictureBox2);
        this.Controls.Add(this.pictureBox3);
        this.Controls.Add(this.buttonStop1);
        this.Controls.Add(this.buttonStop2);
        this.Controls.Add(this.buttonStop3);
       ///
    ///イベントハンドラの設定
       ///
        this.Load += new EventHandler(this.FormSlot_Load);
        this.buttonStart.Click += new EventHandler(this.buttonStart_Click);
        this.buttonStop1.Click += new EventHandler(this.buttonStop_Click);
        this.buttonStop2.Click += new EventHandler(this.buttonStop_Click);
        this.buttonStop3.Click += new EventHandler(this.buttonStop_Click);
    }

    private async void buttonStart_Click(object sender, EventArgs e)
    {
        buttonStop1.Enabled = true;
        buttonStop2.Enabled = true;
        buttonStop3.Enabled = true;
        buttonStart.Enabled = false;

        Random r = new Random();
        int index = 0;

        while( true )
        {
            if( buttonStop1.Enabled == false &&
                buttonStop2.Enabled == false &&
                buttonStop3.Enabled == false)
            {
		if ( pictureBox1.ImageLocation ==
                     pictureBox2.ImageLocation &&
                     pictureBox2.ImageLocation ==
                     pictureBox3.ImageLocation )
                {
                     labelTitle.Text = "あたり!!";
                }else
                {
                     labelTitle.Text = "はずれ!" ;
                }
                buttonStart.Enabled = true;
                buttonStart.Focus();
                break;
            }
            if ( buttonStop1.Enabled )
            {
                index = r.Next(3);
                pictureBox1.ImageLocation = imgPath[index];
            }
            if ( buttonStop2.Enabled )
            {
                index = r.Next(3);
                pictureBox2.ImageLocation = imgPath[index];
            }
            if ( buttonStop3.Enabled )
            {
                index = r.Next(3);
                pictureBox3.ImageLocation = imgPath[index];
            }
            await Task.Delay(100);
        }
    }

    private void buttonStop_Click(object sender, EventArgs e)
    {
        Button btn = (Button)sender;
        btn.Enabled = false;
    }

    static void Main()
    {
        Application.Run( new FormSlot());
    }
}
■まとめ
いかがでしたでしょうか。このようにVisualstudioを使わなくてもメモ帳だけでスロットゲームが作成できました。絵柄が3つしかないので簡単なゲーム内容ですがプログラミング体験できたかと思います。それでは次回はこのスロットゲームを絵柄9にし機能もいろいろ拡張していきたいと思います。
次は下記の記事で別のゲームつくりにもチャレンジしてみましょう!
メモ帳でスロットゲーム【応用編】
メモ帳でパックマン風スネークゲーム

コメント
コードを付けての詳細な解説をありがとうございました。これほどに具体的かつ詳細な解説には初めて出会った感じです。心から敬服いたします。
私は、PythonとかJavaScriptとかHTMLなどは少しは書けるのですが、C#は読むのも初めてのようなものです。数時間を掛けてのトレースを通し、これから勉強していく際のポイントが少し理解できた感じです。
ところで、1点お尋ねです。紹介いただいたコードは、VisualStudioるいはVisualStudioCodeで使えるものですか?そのままは使えないとすれば、どのような変更が必要なのか、概論的にでもお教えください。
中村 理 さま
コメント投稿いただきまして誠にありがとうございます。
また、返信が大変遅くなり申し訳ございません。
ほとんどコメントが無いものですから投稿を見逃していました。
スパムメールのような英文字のコメントばかりで日本語のコメントが付いたのははじめてです。
ブログをちゃんと見ていただいている人がいるということがとてもうれしいです。
さて本題のご質問の件ですが、
VisualStudioでもVisualStudioCodeでもいずれも実行はできます。
VisualStudioで作成する場合は空のアプリから開始すればおそらく大丈夫だと思います。
VisualStudioCodeはテキストエディタですので、メモ帳アプリで開くかわりに「Codeで開く」で
大丈夫だと思います。
実はこの記事は、C#を始めて3か月程度で仕上げたものです。プログラミング作成と記事作成に
1か月、仕事終わりに毎日コツコツ書いていたのを思い出しました。
記事内容は、全くのプログラミング初心者でも分かるように心がけました。
自分のアウトプット用(後から見直せるように)としても残したかったのですが。
また何かありましたらぜひコメントよろしくお願いいたします!